Radio TLG10UA03 WiFi To TTL-UART Module
Original price was: 220.00 EGP.200.00 EGPCurrent price is: 200.00 EGP.
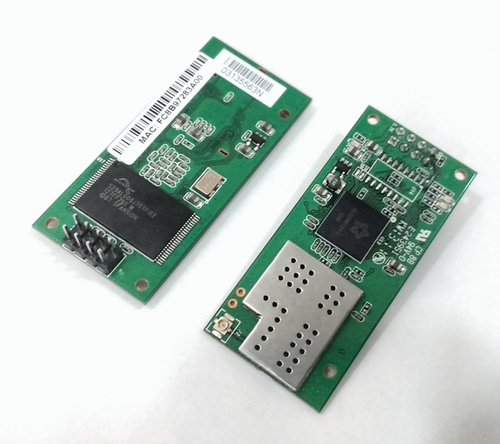
The TLG10UA03 is a compact and efficient WiFi to TTL-UART bridge module, designed for seamless wireless communication between microcontrollers (like Arduino, ESP, STM32) and WiFi networks. It enables bidirectional data transmission over WiFi, making it ideal for IoT, smart home automation, remote monitoring, and wireless control applications.
Description
Radio TLG10UA03 WiFi To TTL-UART Module
Key Features:
✔ WiFi Connectivity – Supports 2.4GHz IEEE 802.11 b/g/n standards.
✔ UART Interface – TTL-level (3.3V) serial communication (RX/TX) for easy MCU integration.
✔ Built-in TCP/IP Stack – Enables direct WiFi-to-serial data transfer.
✔ Compact Design – Small form factor for space-constrained projects.
✔ Low Power Consumption – Optimized for battery-powered IoT devices.
✔ Configurable Modes – Supports STA (Station), AP (Access Point), and STA+AP modes.
✔ Secure Connection – Supports WPA/WPA2 encryption for secure data transfer.
✔ Baud Rate Adjustable – Typically 9600–115200 bps (configurable via AT commands).
✔ Operating Voltage: 3.3V DC (5V-tolerant inputs with level shifting).
✔ Onboard Antenna – Stable wireless performance with integrated antenna.
Applications:
-
IoT & Smart Home Devices (remote sensors, smart switches)
-
Wireless Data Logging (sensor networks, environmental monitoring)
-
Industrial Automation (machine-to-machine communication)
-
DIY Robotics & Drones (wireless control & telemetry)
-
Embedded Systems Prototyping (WiFi-enabling legacy devices)
Setup & Configuration:
-
AT Command-Based – Configure SSID, password, IP, and protocol (TCP/UDP).
-
Plug-and-Play – Simple UART connection to microcontrollers.
-
Example Use Case: Transmit sensor data from an MCU to a cloud server via WiFi.
Package Includes:
-
1x TLG10UA03 WiFi Module
-
Documentation (AT command list, pinout diagram)
Why Choose This Module?
✅ Reliable wireless communication with minimal setup.
✅ Compatible with 3.3V/5V systems (with caution).
✅ Cost-effective WiFi solution for embedded projects.





Reviews
There are no reviews yet.